 WordPress is easily one of the best open source content management systems (CMS) available.
According to the Wikipedia page, WordPress is used on 22% of all new websites which is a significant number.
This is not surprising either as WordPress has made it extremely easy for just about anyone to build their own websites with a domain and a hosting account.
You can customize it to create beautiful websites which you can use to document your personal travels or start an online business. If you are serious about starting a freelance career, then having your own blog is a must, which is exactly what I’m doing with my blogging case study.
In this post I’ll go over how to install WordPress on your new domain.
Installing WordPress
Now that you have your domain and a hosting account, you just need to install WordPress and you’ll have a fully functional website in literally minutes.
Before getting started, you’ll need to first make sure that your domain name servers are changed and pointed to the right destination.
I use Internet.bs as my domain registrar so that’s where we need to log in to change the name servers.
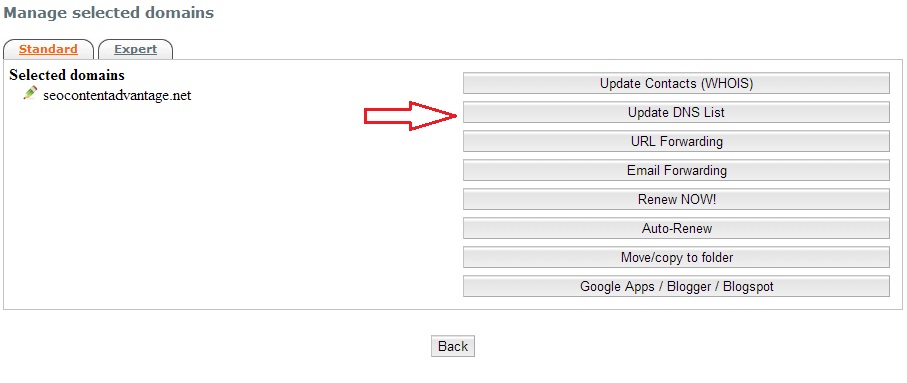
Once logged in, you’ll need to select your domain and click Update DNS List:
Then on the next screen, you simply input your name servers and click Save.
If you are not sure what your name servers are, then be sure to look through your welcome email when you purchased a hosting plan or contact your hosting company.
I use the HostGator Baby Plan for all my domains and together with Internet.bs, I’ve never had any problems.
Keep in mind that changing name servers can take a few hours or even longer to resolve so you may need to wait before you can actually add the newly purchased domain to your hosting account.
Once that’s taken care of, the next step is to install WordPress.
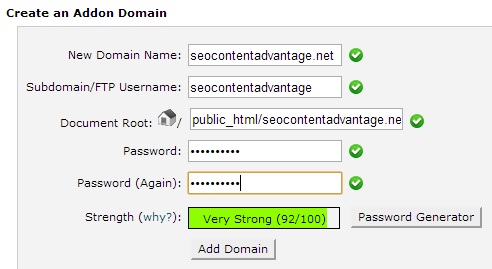
In your control panel, click Addon Domains under Domains:
Then enter in the information for your new domain:
And click Add Domain.
Then go back to your Control Panel and click Fantastico under Software/Services:
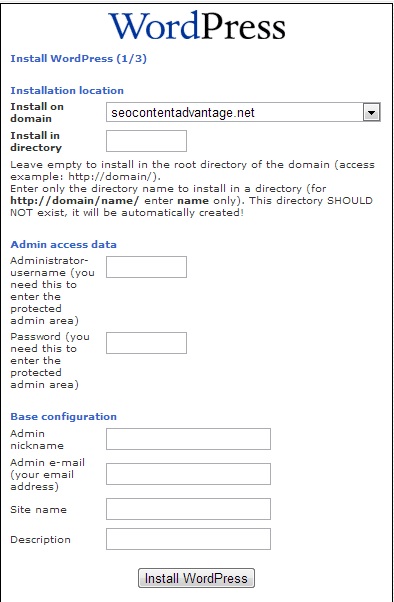
On the left hand side, click WordPress then click New Installation.
Then on the next screen, choose the new domain name from the drop down list that you want to install WordPress on and fill out all the information.
Then click Install WordPress and Finish Installation on the following screens:
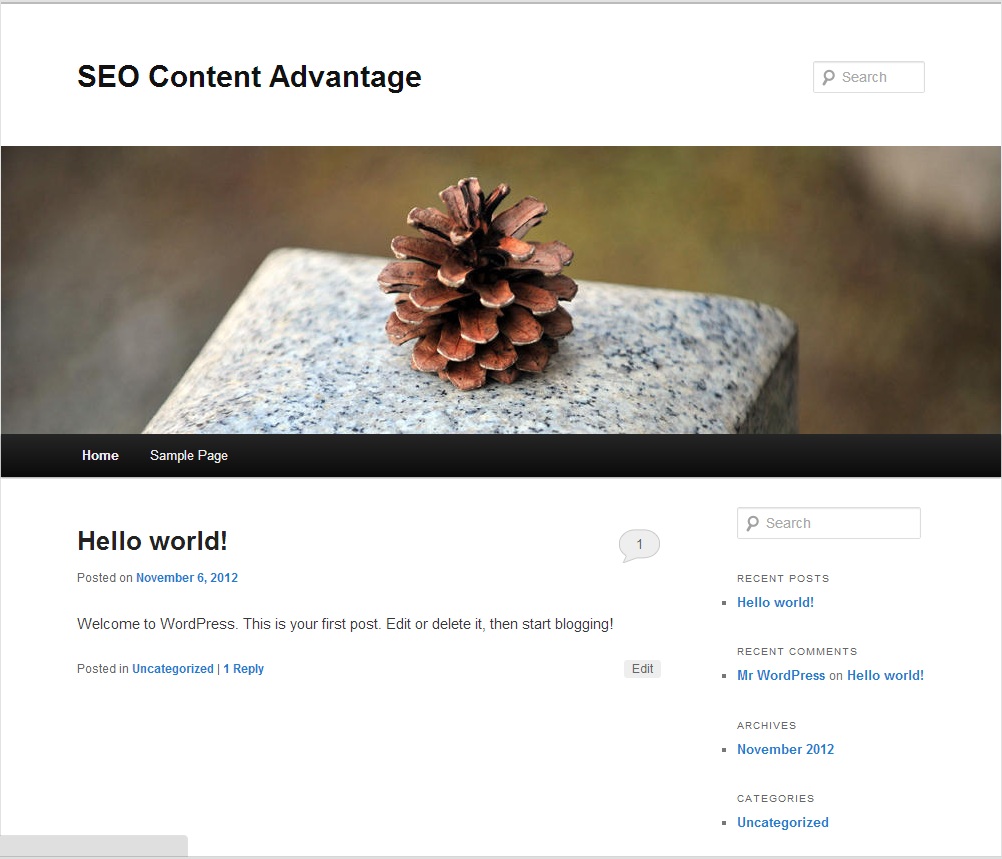
That’s it! If you followed these steps, then your domain will now have WordPress successfully installed and you’ll see the following when you visit your domain from your browser:
Before ending this post, there is one more thing that I want to clear up.
WordPress.com Versus a Self Hosted WordPress Blog
Always stick with a self hosted WordPress site.
The websites at Hann Wang and SEO Content Advantage are examples of self hosted WordPress blogs in that the domains are purchased through Internet.bs and hosted with my HostGator account.
An alternative to this is creating a blog at WordPress.com. The upside is that you don’t have to pay for domain or hosting fees but the downside is that technically you don’t own the domain.
You can see an example of this by going to my WordPress blog at hannwang.wordpress.com
I’m not saying that you can’t be successful with a WordPress.com blog but I do feel that having a self hosted blog is much more advantageous if you are starting a freelance business.
Now that my website is up, the next step is to get a professional theme installed on it.


